
Saved filter templates let you define complex board filters once and switch between them instantly. Instead of manually re-applying filters every session, you save a view and recall it with one click — perfect for recurring views like “My Open Leads” or “This Week’s Follow-Ups.”
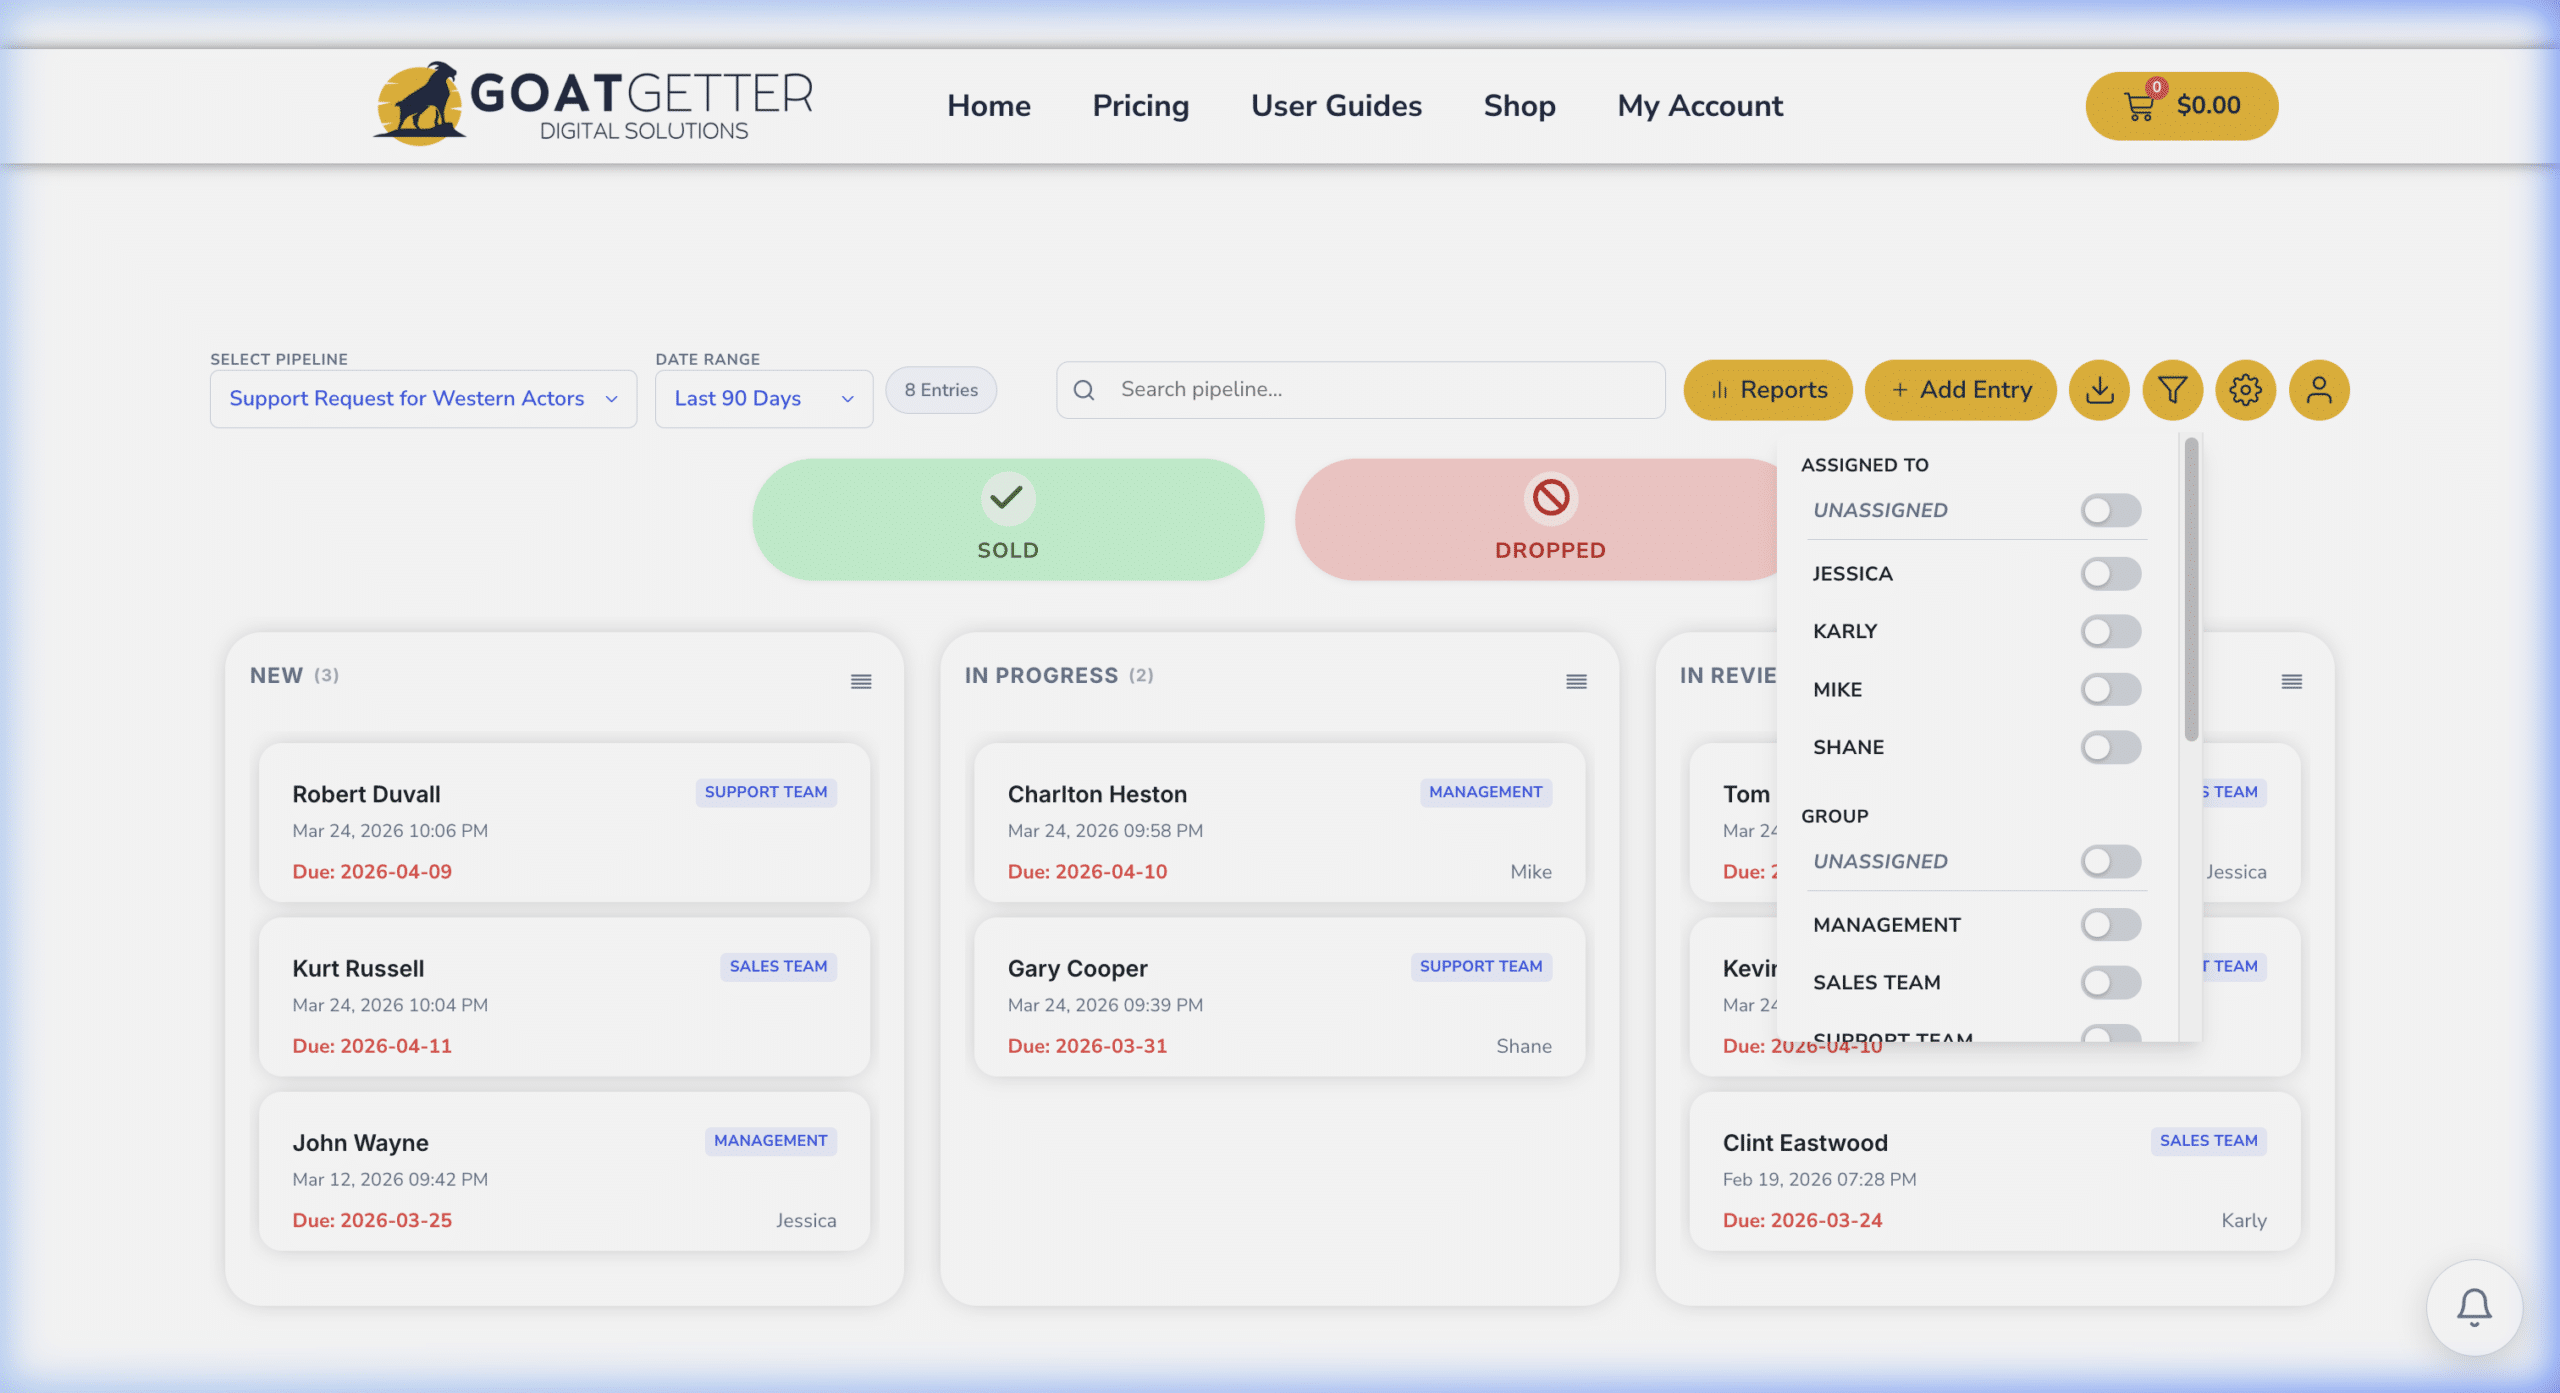
Available Filter Options
- Assigned To — filter by one or more team members
- Stage / Column — show only entries in specific stages
- Date Range — filter by submission date or last updated
- Form Field Values — filter by any mapped field (e.g., “Product Type = Commercial”)
- Group — filter by team group
Creating a Filter Template
- Open your pipeline board.
- Click the Filter icon in the board toolbar.
- Apply your desired filters from the filter panel.
- Click Save as Template.
- Name your template (e.g., “My Leads – Open”) and click Save.
Using a Saved Filter Template
- Click the Filter icon on the board toolbar.
- Under Saved Templates, click the template name to apply it instantly.
Editing or Deleting a Template
Open the filter panel, load the template, make your changes, then click Update Template. To delete, click the trash icon next to the template name in the saved templates list.
Sharing Templates With Your Team
Filter templates are currently per-user — each team member saves their own. For consistent team-wide views, create a naming convention (e.g., “TEAM: All Active Leads”) and instruct each user to save the same filter configuration under that name.