
One of the most powerful features of Gravity Pipeline is the ability to move entries between stages with a simple drag and drop. This guide explains how it works, what happens in the background, and how to make the most of it.
How Drag & Drop Works
- Open your pipeline board from Forms > Gravity Pipeline.
- Click and hold any pipeline card.
- Drag it to the target column (stage).
- Release to drop. The card moves instantly.
Behind the scenes, Gravity Pipeline updates the corresponding Gravity Forms entry — changing the status field value to match the new column. This means your Gravity Forms data always stays in sync with the board.
What Gets Updated
- The entry’s status field value is updated to the new stage’s form value.
- The entry’s date updated timestamp is refreshed.
- If you have stage-change notifications configured (Pro), those fire automatically.
Moving Multiple Cards (Pro)
Gravity Pipeline Pro supports Bulk Entry Management — select multiple cards using the checkbox on each card, then use the bulk action toolbar to move all selected entries to a new stage at once.
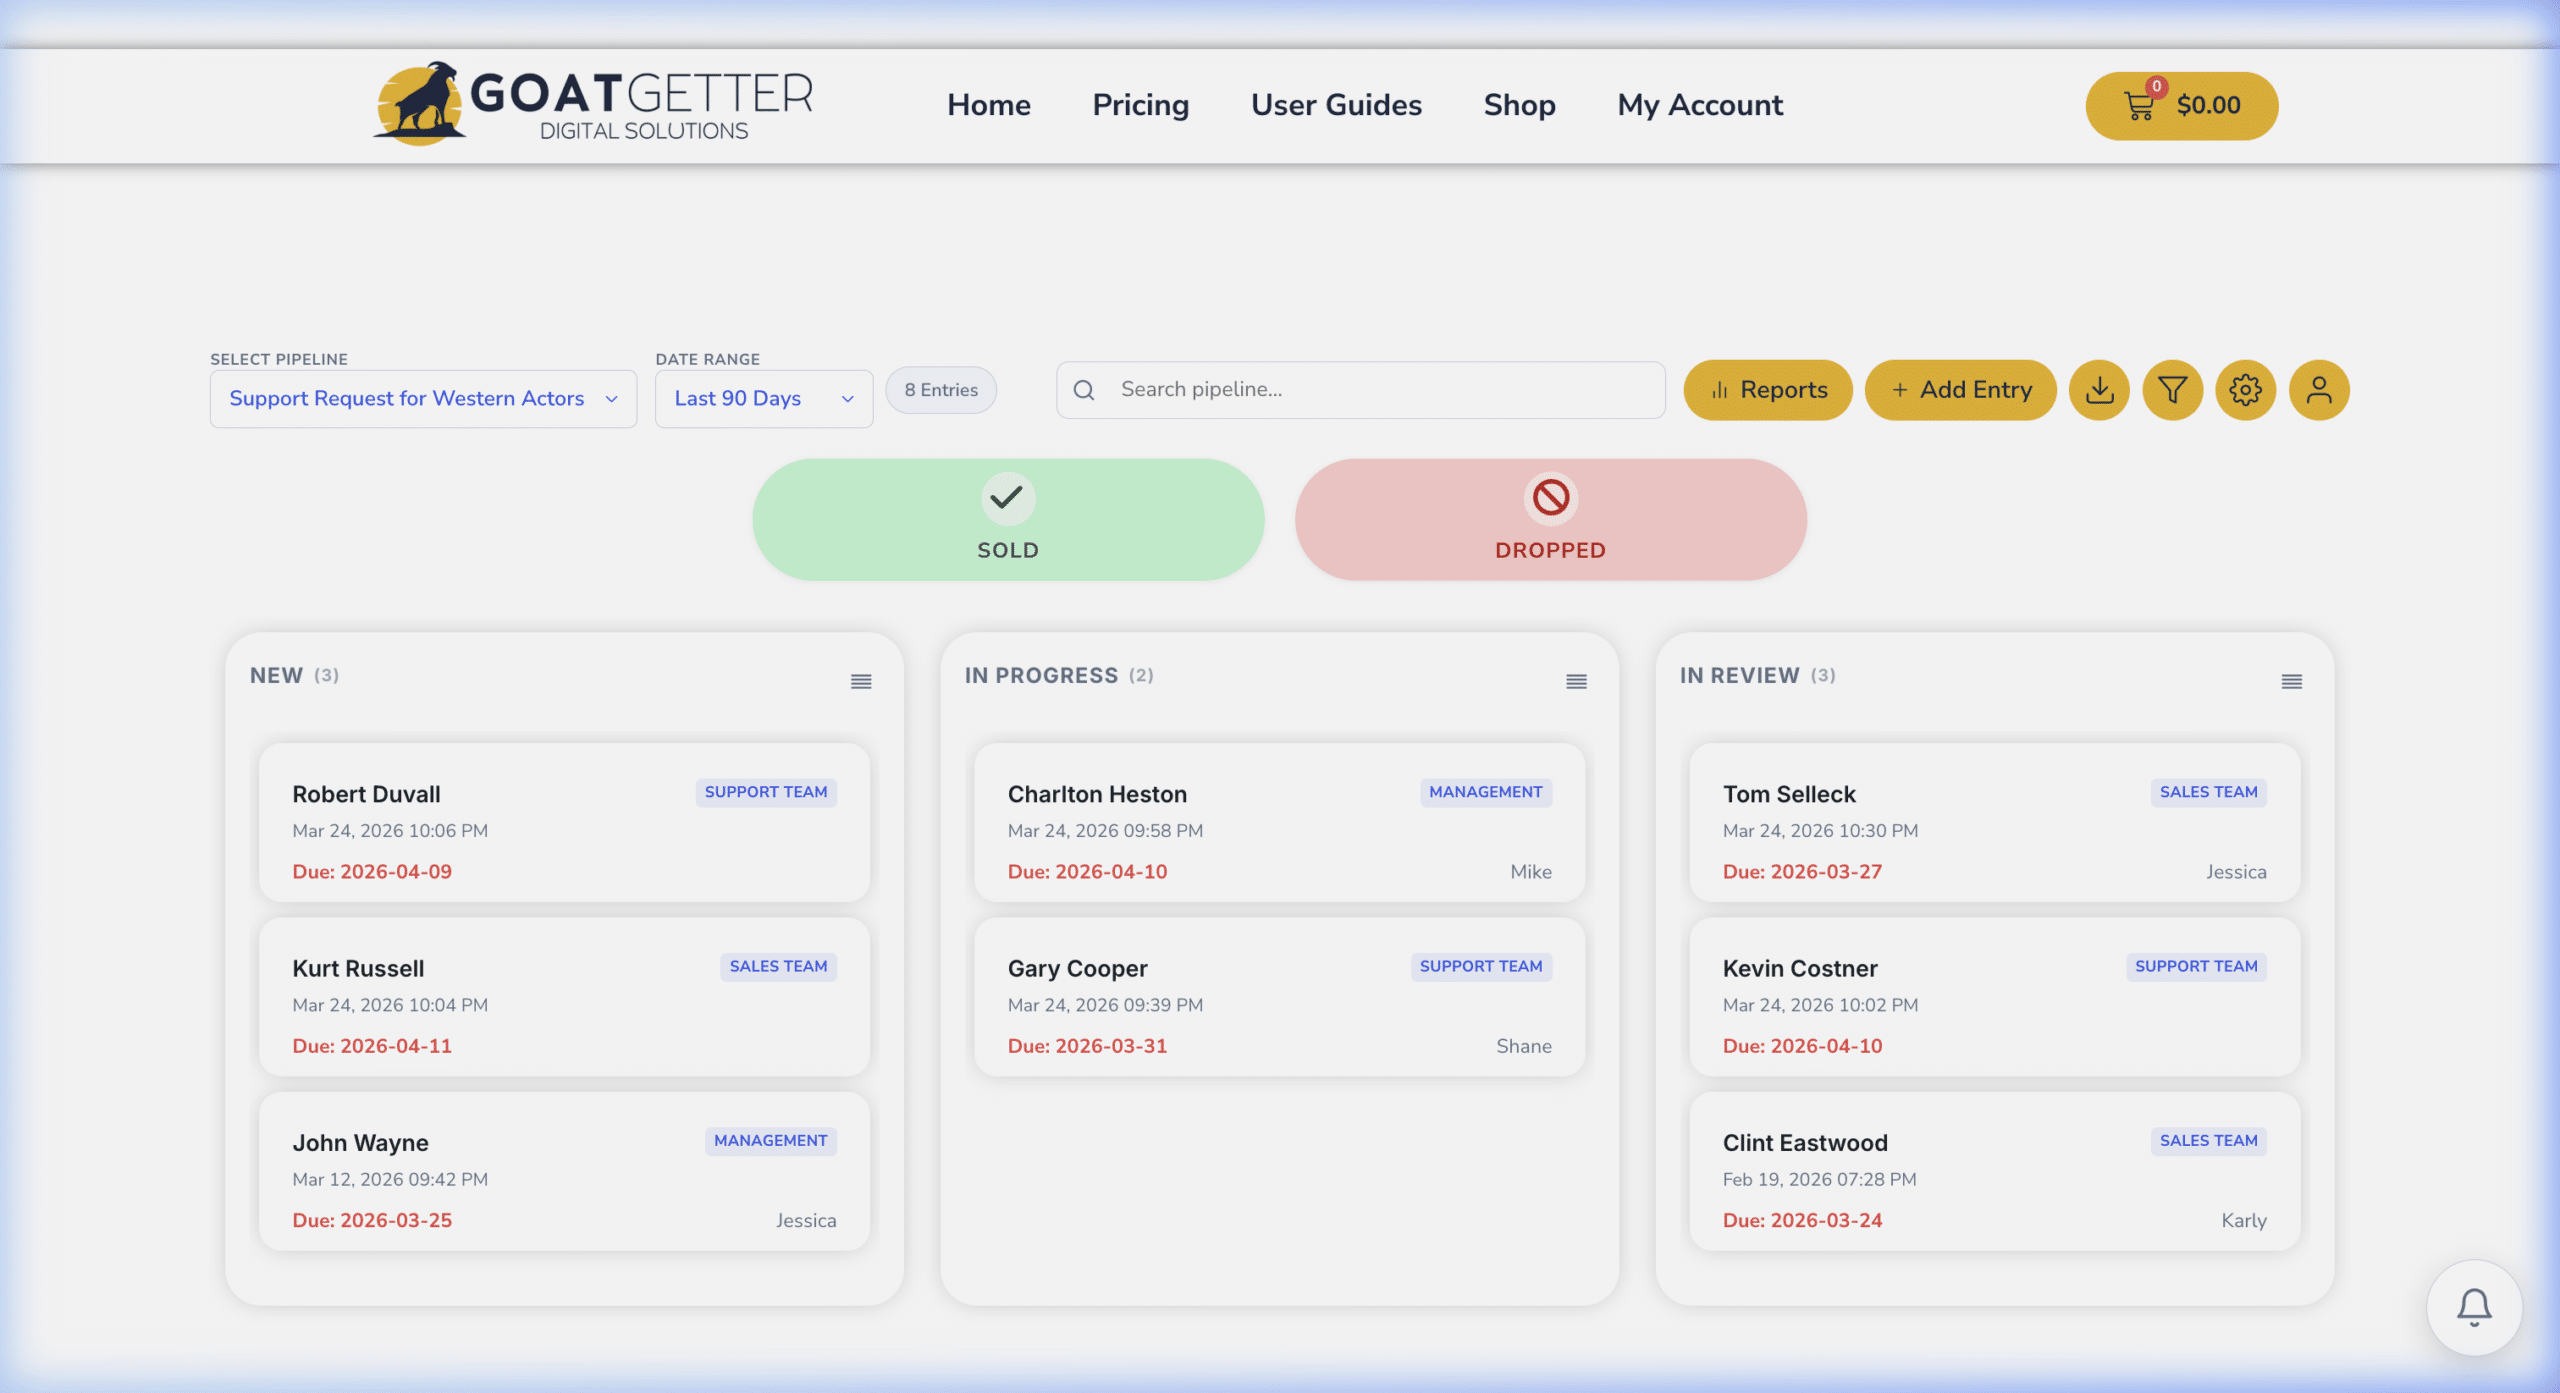
Archive Drop Zones (Pro)
Pro users have access to Won/Sold and Lost/Dropped drop zones that appear below the main board. Dragging a card into one of these zones archives it — removing it from the active board without deleting the entry. See the Archive Drop Zones guide for details.
Troubleshooting
- Card won’t move: Check that your user role has edit permissions for Gravity Forms entries.
- Card moves but returns to original column: The form value for the destination column may not match the form field choice exactly. Check your column mapping in the feed settings.